Light Up Your Morning With a Simple Flashing Alarm
Ugh, mornings. Amirite?
If you’re anything like me, you find the early mornings a chance to be super productive before the rest of the family is up, or maybe it’s just a chance to sip your coffee in peace, but sometimes it’s just so easy to hit the snooze bar. So. Easy...
You have a light somewhere in your room, right? Maybe even one on your bedside table? Flashing that a few times can help get your attention, and wake you up. You can even add some randomness, to help the ‘Sleepy You’ avoid learning to ignore it!
A word of warning: — if you share a room with your spouse, a roommate, a sibling, or anyone else, please make sure they know you’re doing this (and please don’t blame me if the conversation tomorrow morning doesn’t go well!)
What you’ll need:
Not much - since you’ve found your way here, you probably already have all of this:
Signals for HomeKit, running on your iPhone or iPad
Supporting multiple Signals with randomness does require Signals 2.1.8, and iOS 16.1 (there’s a bug in 16 😡) - if you’re not on those versions yet, you can still create your alarm, but your Shortcut Automation will be a bit more complicated.
Any HomeKit-compatible light - Can be a Bulb, Switch or Plug (configured as a Light)
A few Signals that will control your light, and sets a custom finish. Add some variability here to keep things fresh for you every morning.
A super-quick Shortcut Automation, which we’ll walk through below

The Signals
We’ll create a few slightly different Signals for this overview, and I’ll walk you through creating the first Signal is detail. The light that I call “Matt’s Lamp” here is a Nanoleaf Essentials bulb, which supports full color — if you have a bulb that only supports dimming, or even a ‘dumb’ lamp plugged into a Smart Plug, you can still use it as an alarm, but of course your options will be more limited.
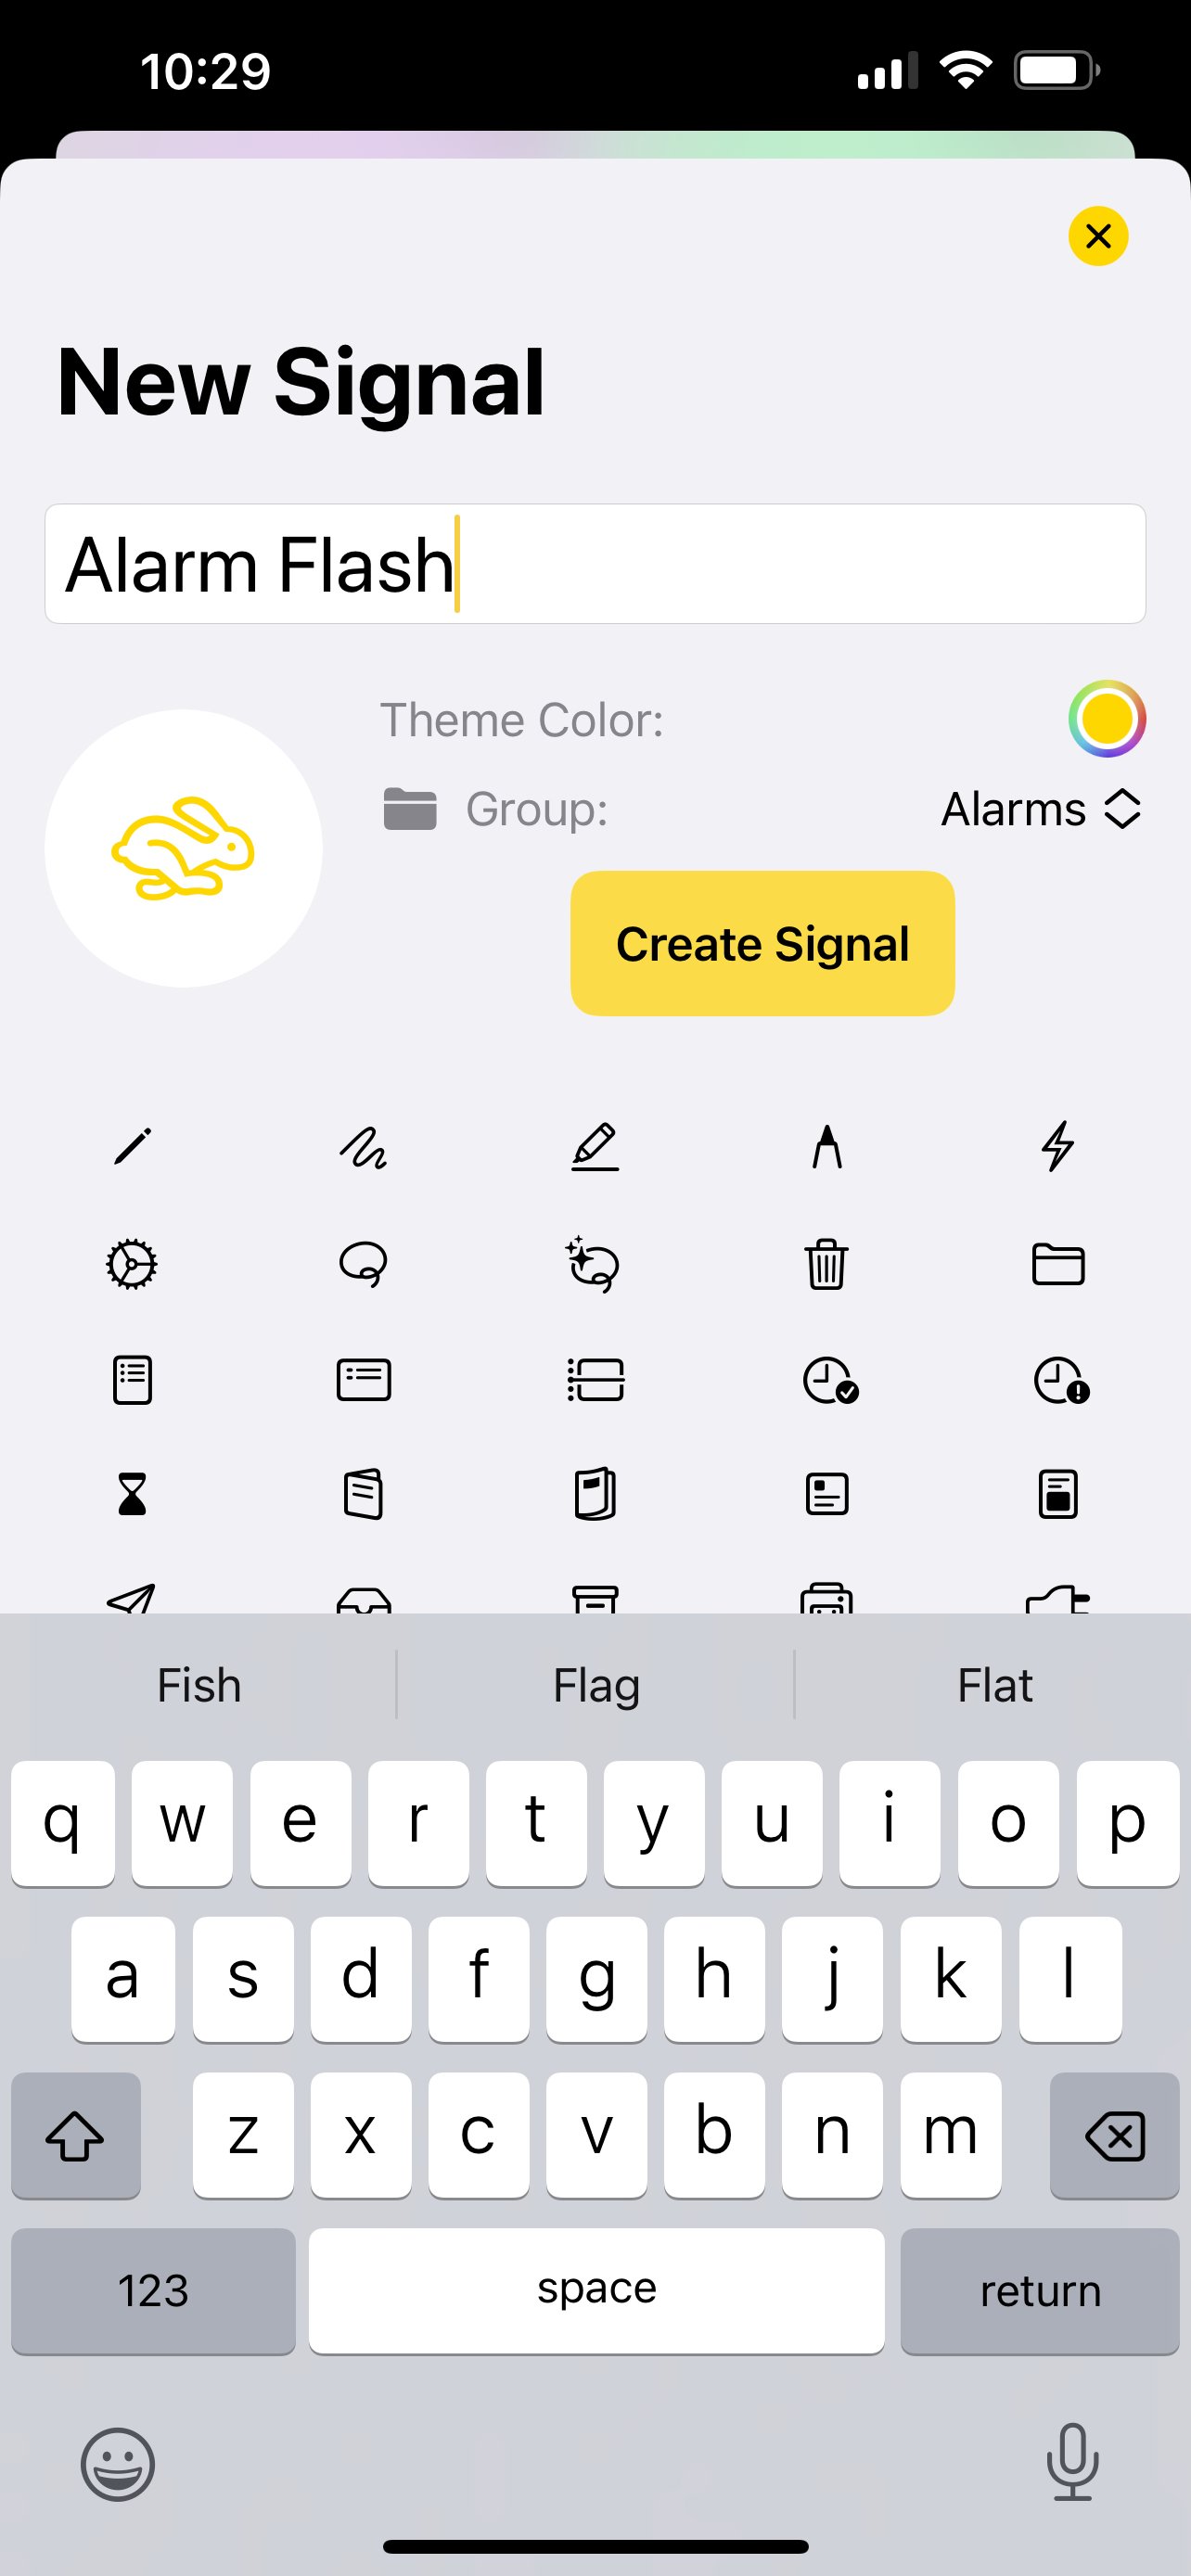
Start by tapping ‘New Signal’, giving it a name, a color, and selecting an icon. Before you’re done, be sure to tap the ‘No Group’ picker, and select ‘New Group’ — give it a name like ‘Alarm’. This will come in handy later, and make it really easy to filter all of your Alarm Signals, and pick a random one during your Automation.
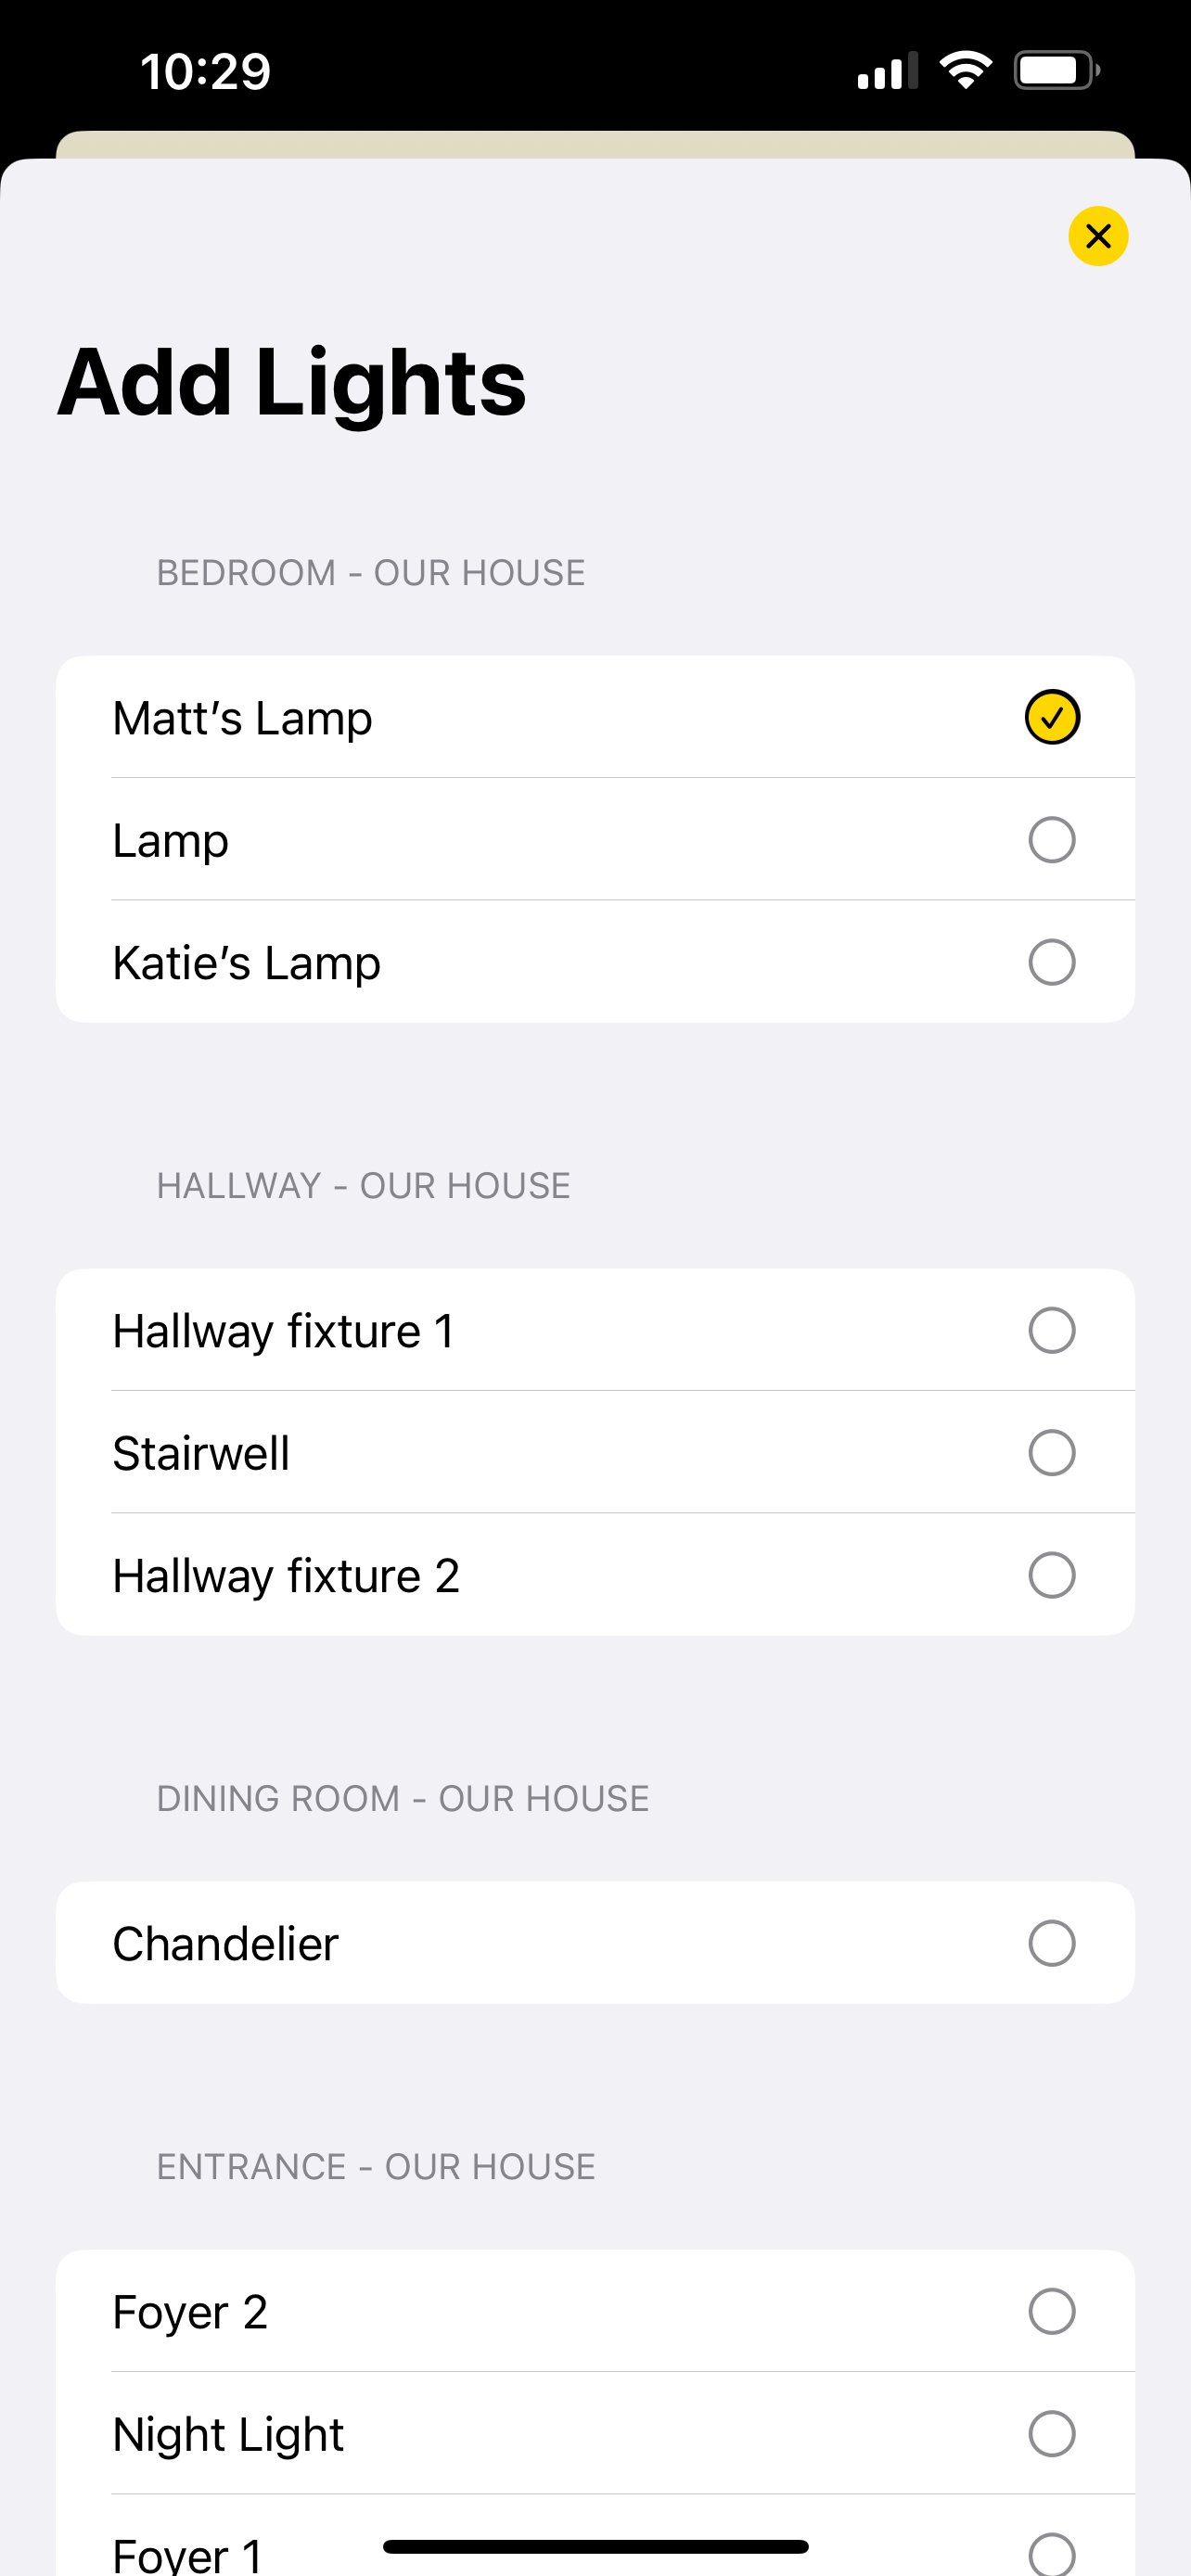
Now that you have the Signal created, it’s time to tell it what to do. Start by tapping ‘Edit >’ in the ‘Effects’ section, and selecting your bedside lamp. Back on the Signals screen, tap the ‘…’ button on the selected light tile, and further configure the Effect - in this case, I chose the ‘Flash’ effect, moved it up to 5 seconds, and chose to flash the light red.
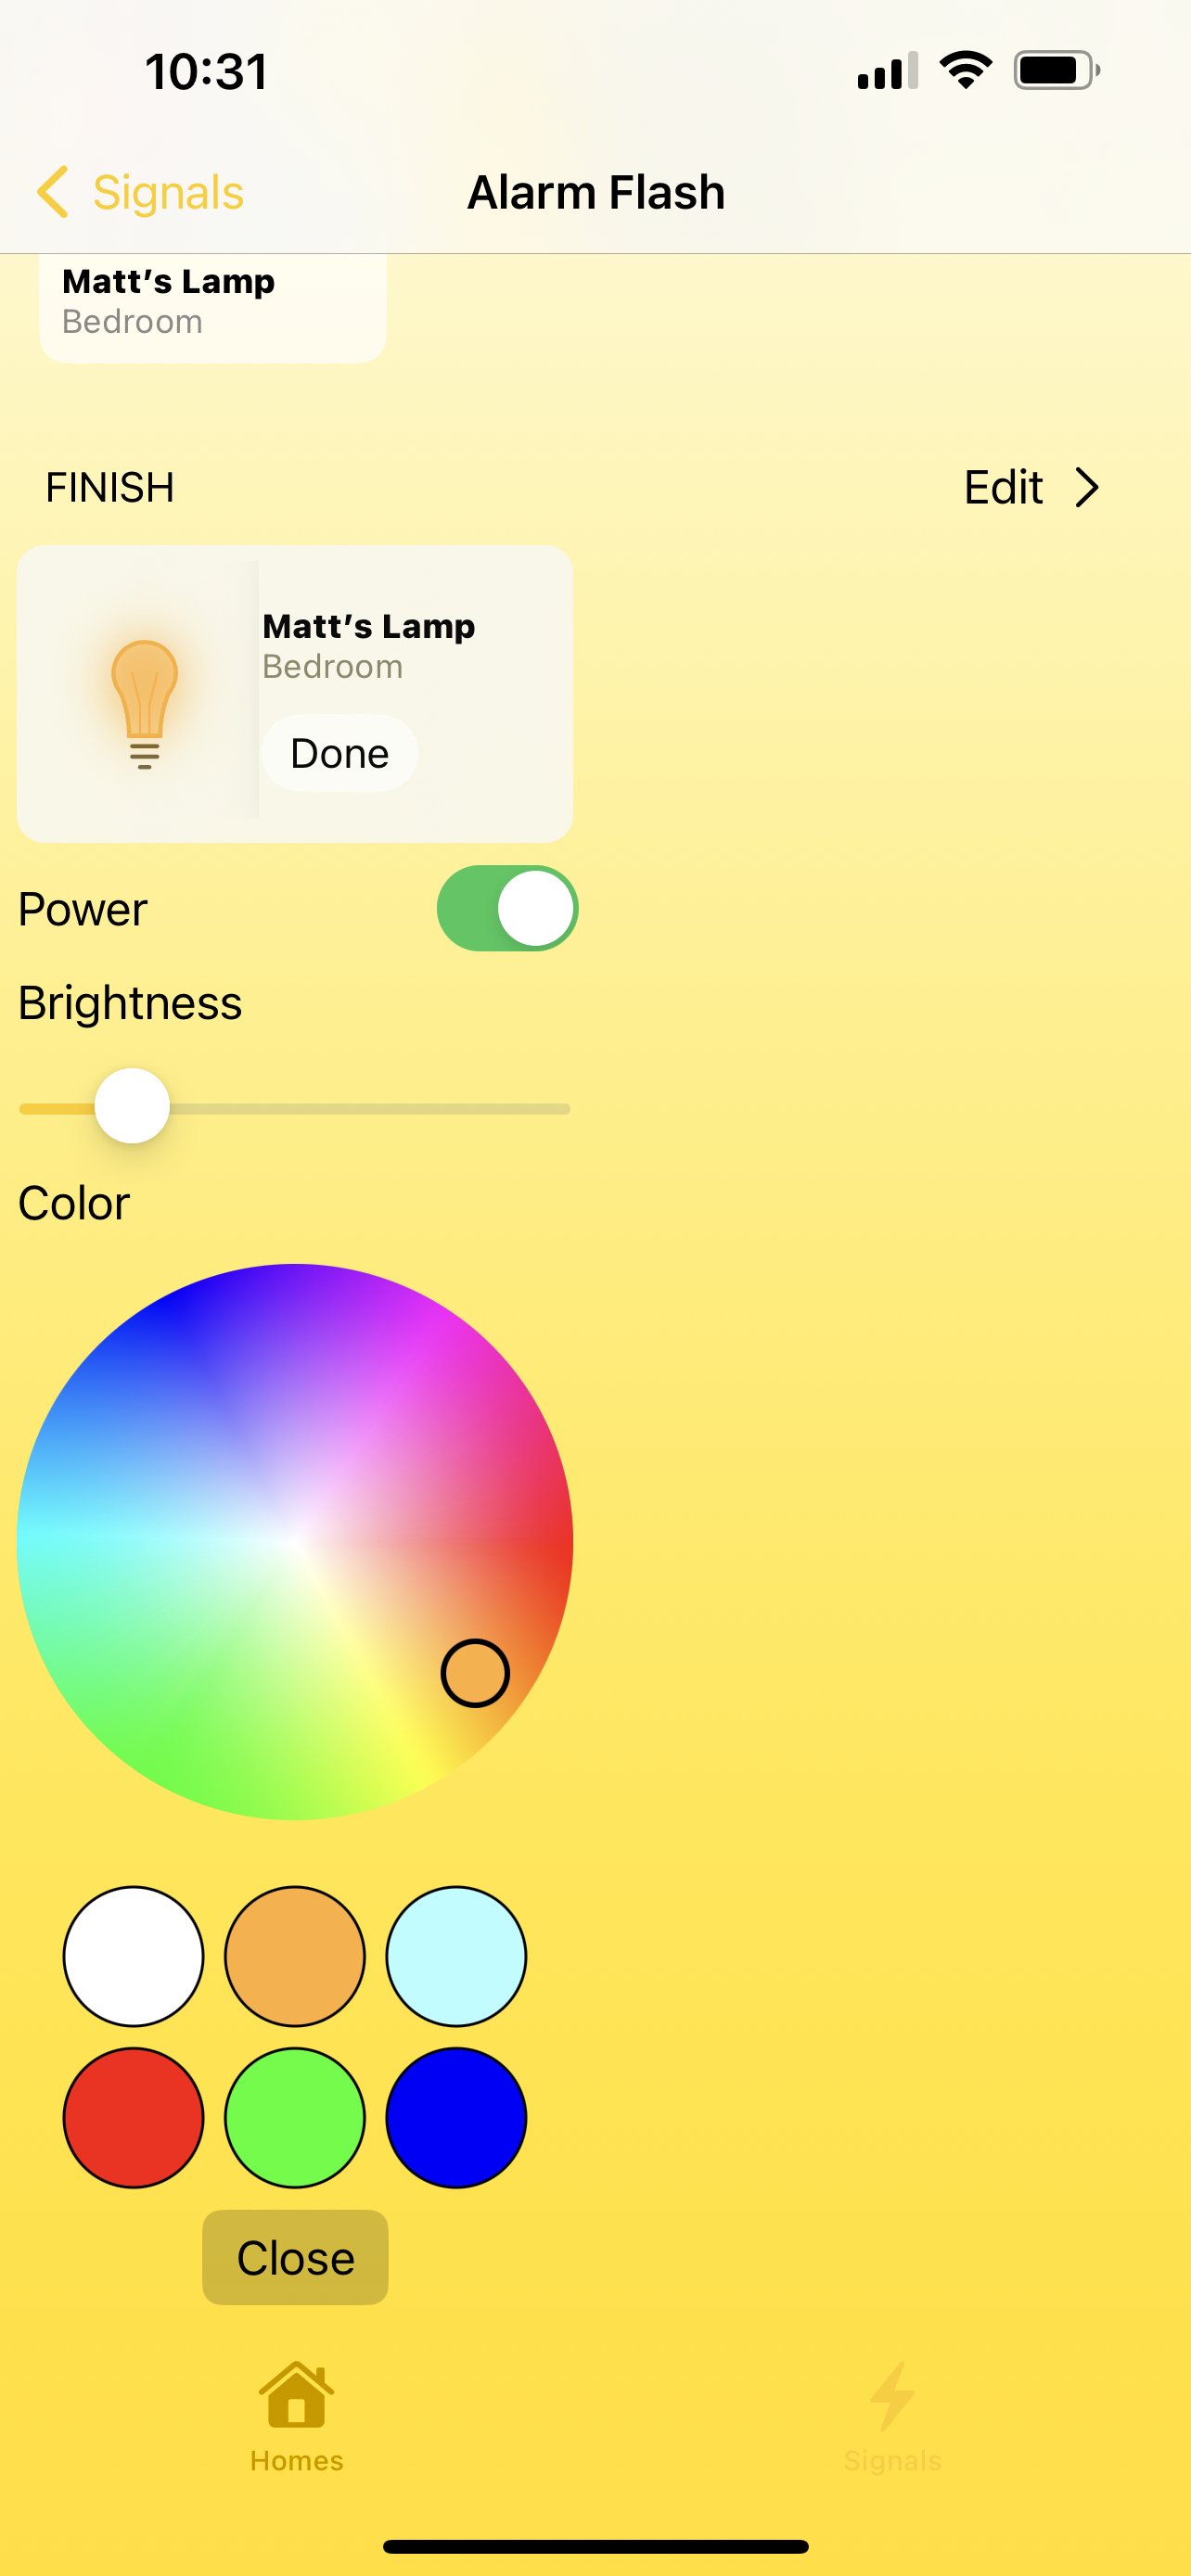
When we’re done, this Signal will return the bulb to its’ previous state — presumably off, since this is an alarm clock. I really like to change this up, though, and in this case, I’ve created a custom ‘Finish’, to keep the light on at a relatively dim level, and turn it orange.
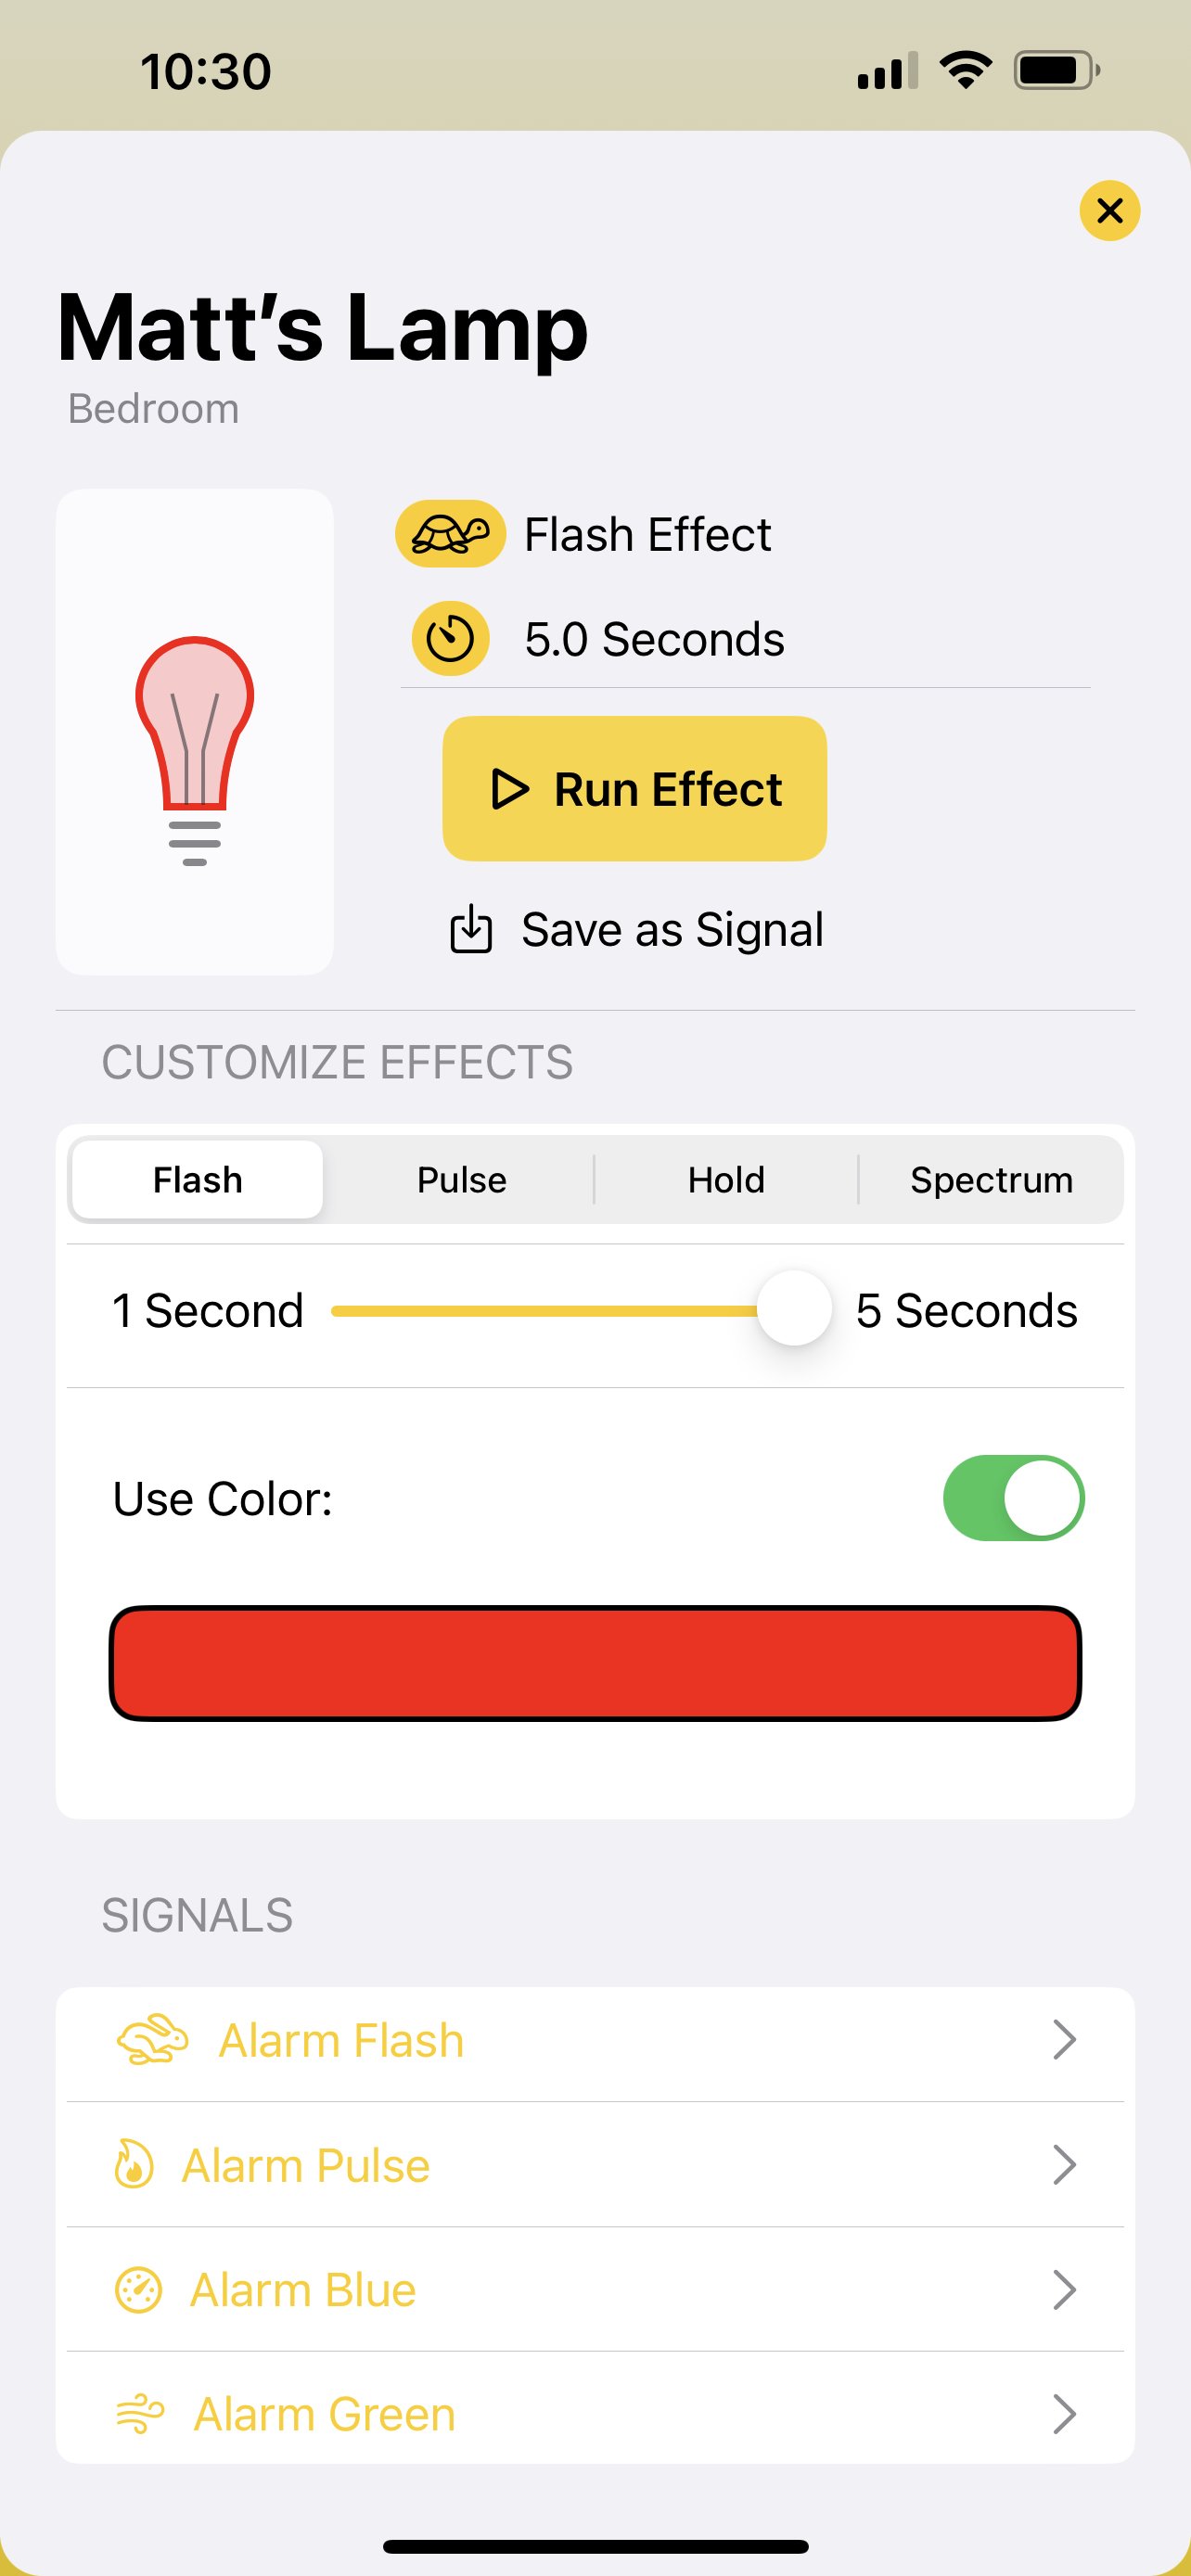

And that’s it - we’ve configured our first Signal! I always recommend running this, to make sure it will do what you want. You can do that right from this screen, and tweak it to make it work for you, but don’t forget that you’ll have a few other Signals created to mix things up — I’ll leave it to you to create this in whatever way works best.
The Shortcut Automation
Creating the Shortcut automation is deceptively simple, in large part because of some simple new features that Apple has provided to developers in iOS 16.
Start by opening the Shortcuts app, tapping the ‘Automation’ tab at the bottom, and creating a new Shortcut by tapping the ‘+’ button. For this automation, you’ll want to create a ‘Personal Automation’, select ‘Alarm’ as the trigger, and configure it to run when your ‘Wake-Up’ alarm ‘Goes Off’. The wording of this on the screen is a little odd, but it makes sense as a command to “Run this Automation when my ‘Wake-Up’ alarm Goes Off” - this includes repeated alarms if you like hitting Snooze, which is a nice touch!


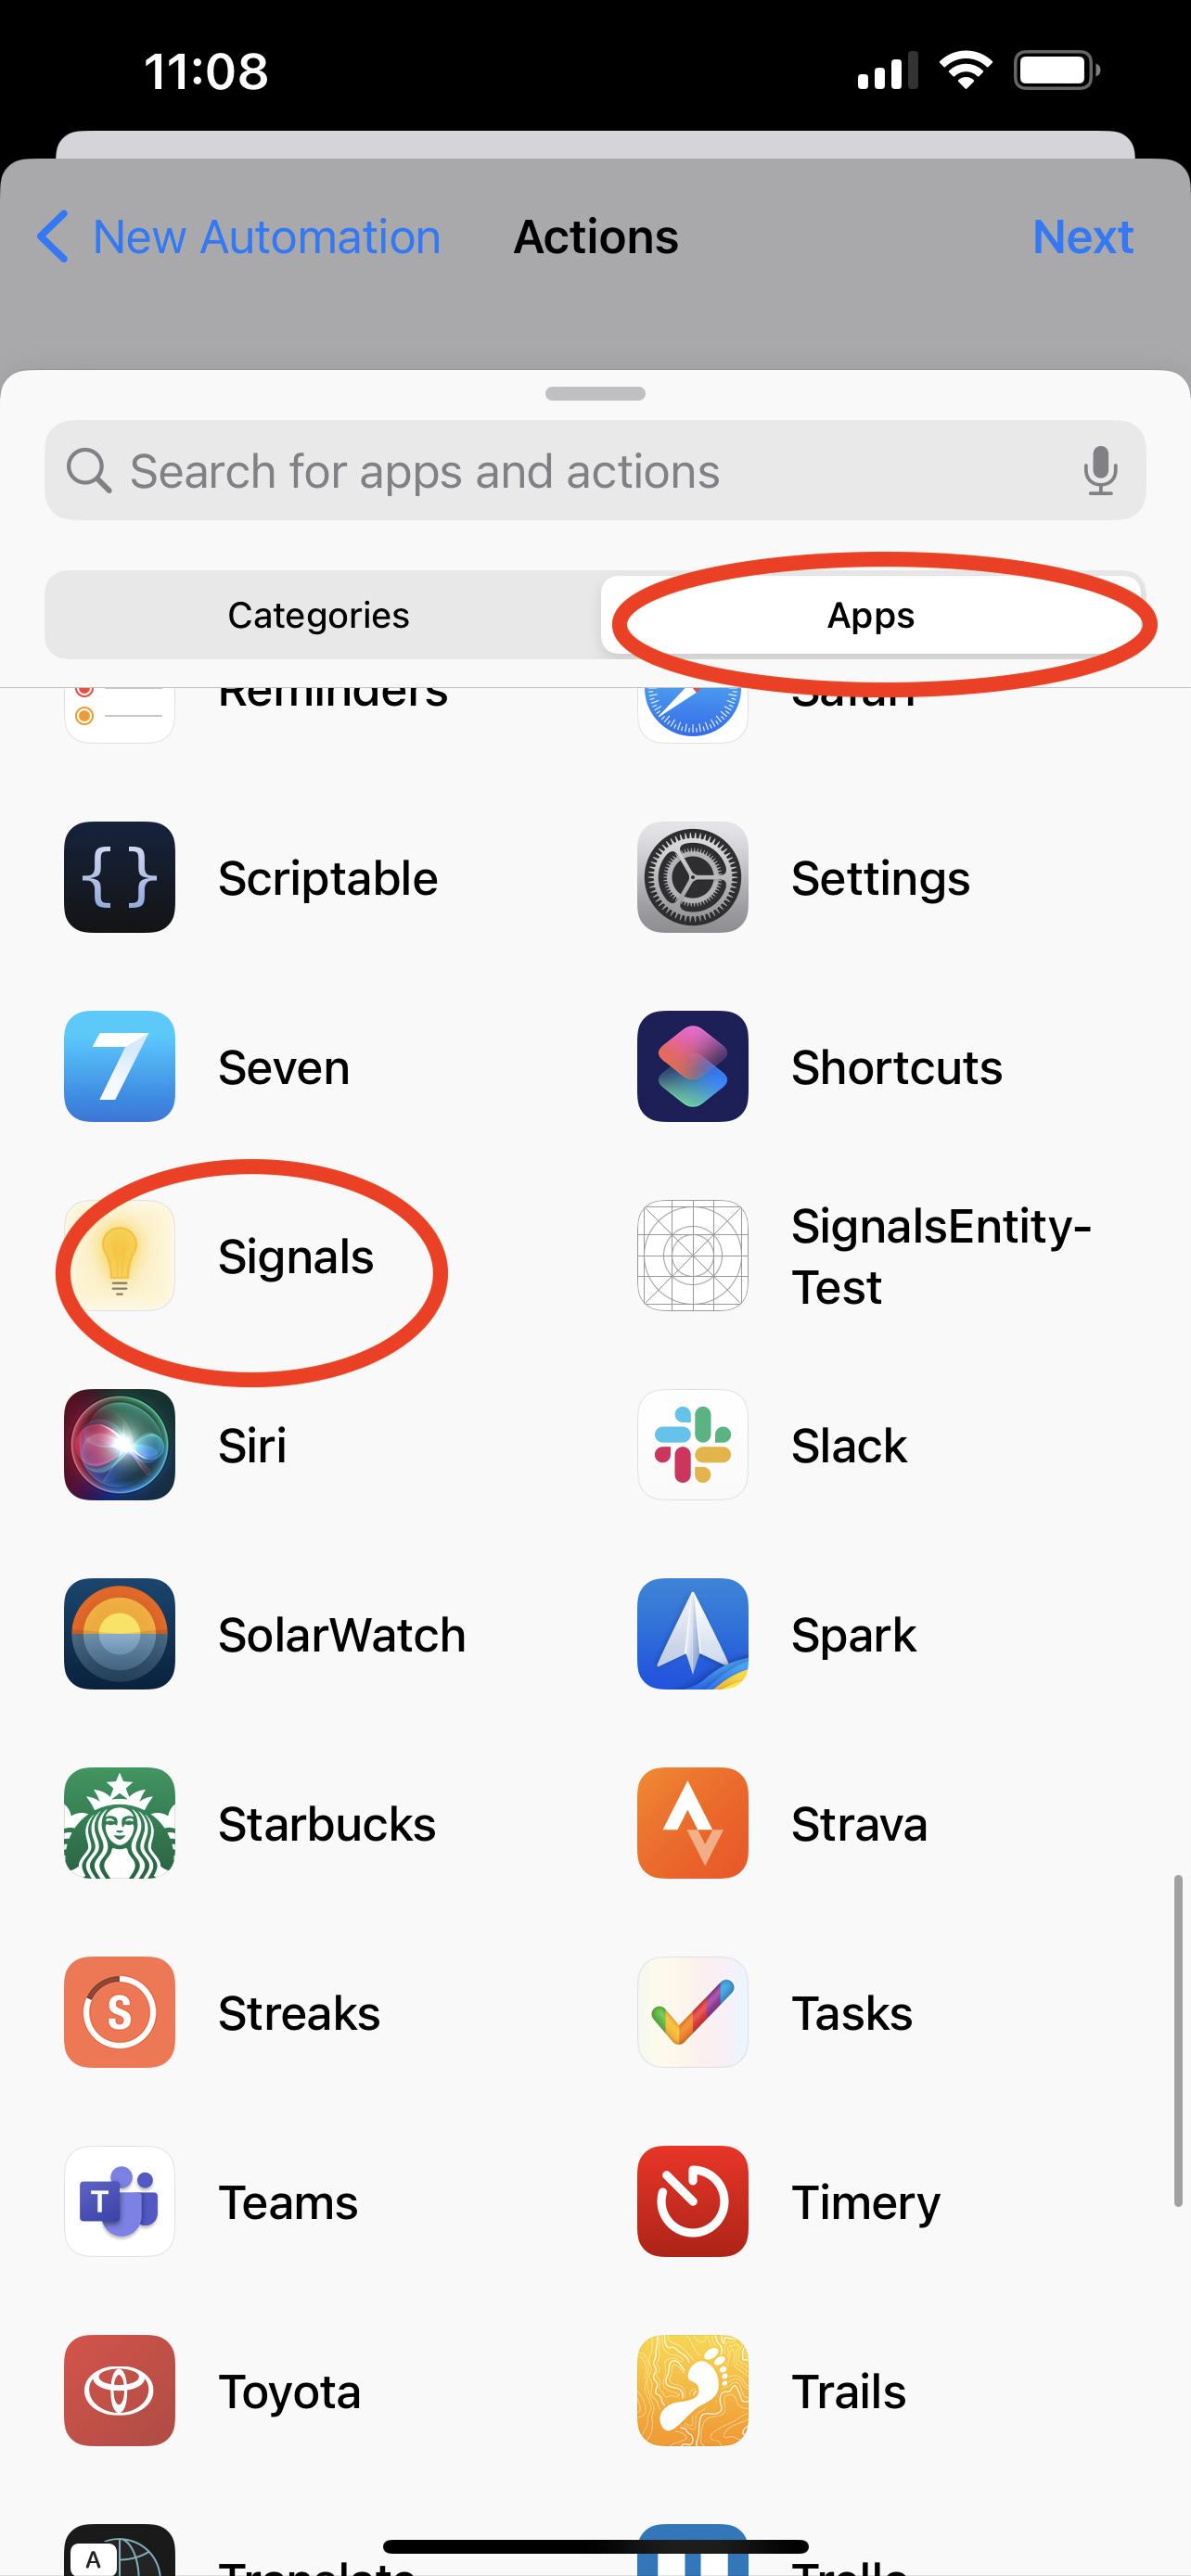
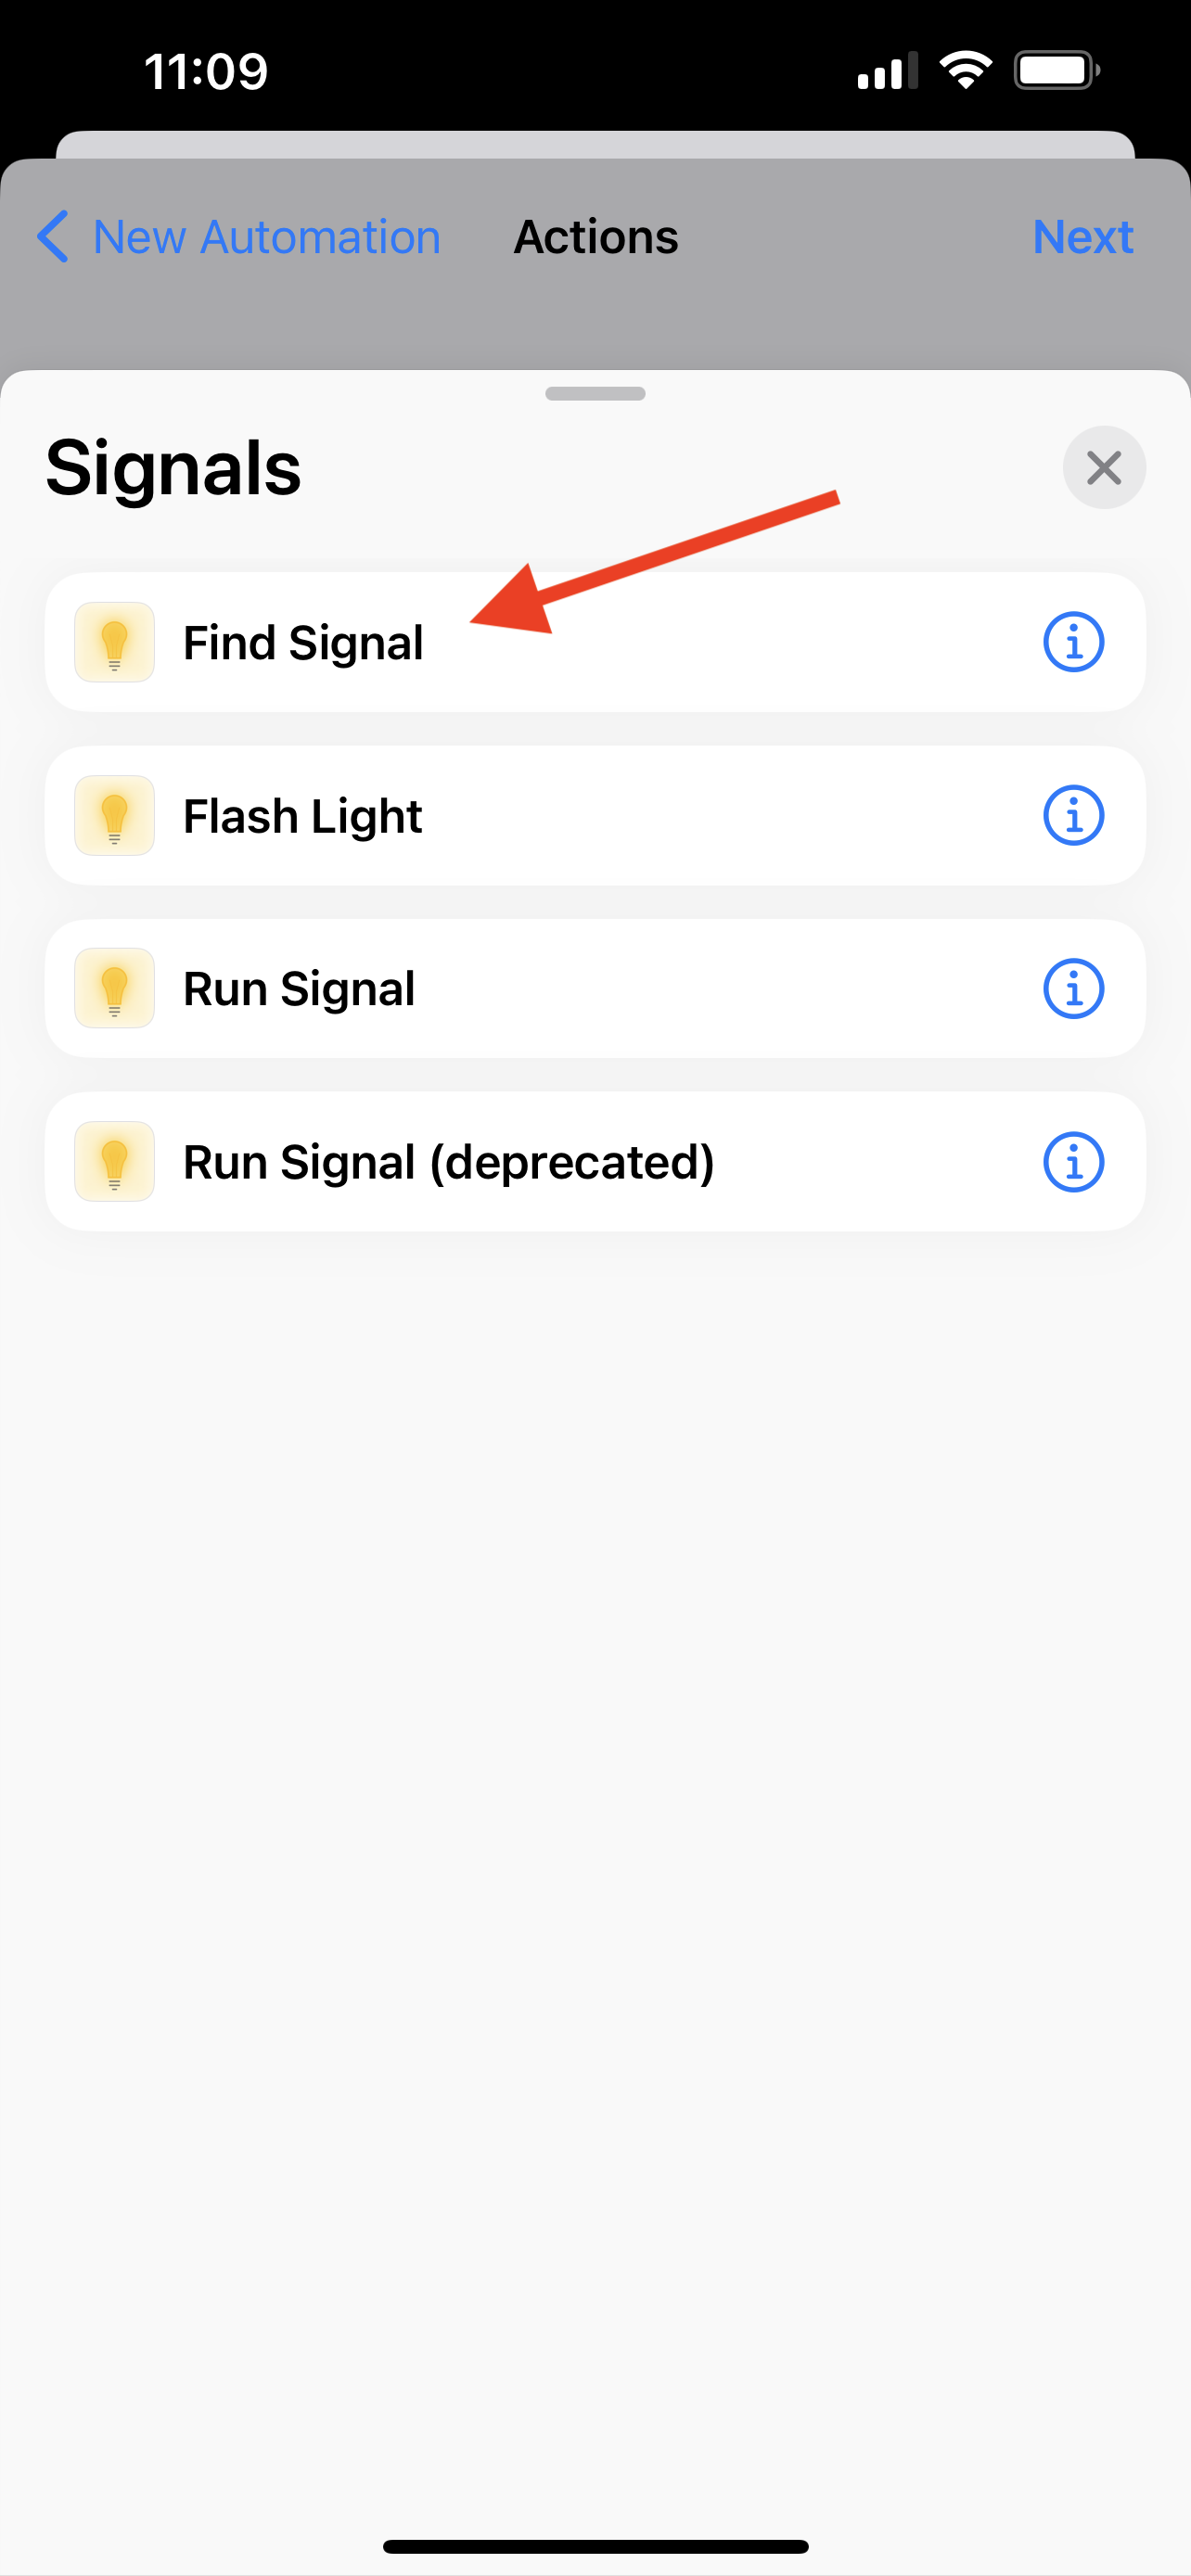
That’s the Trigger configured - tapping ‘Next’ will bring us to the Actions screen. Start by tapping ‘Add Action’, selecting ‘Apps’, and scrolling down to find ‘Signals’ (you’ll need to scroll for a while if you have a lot of apps installed, like I do 😳). This should show you a list of available actions - tap ‘Find Signal’.
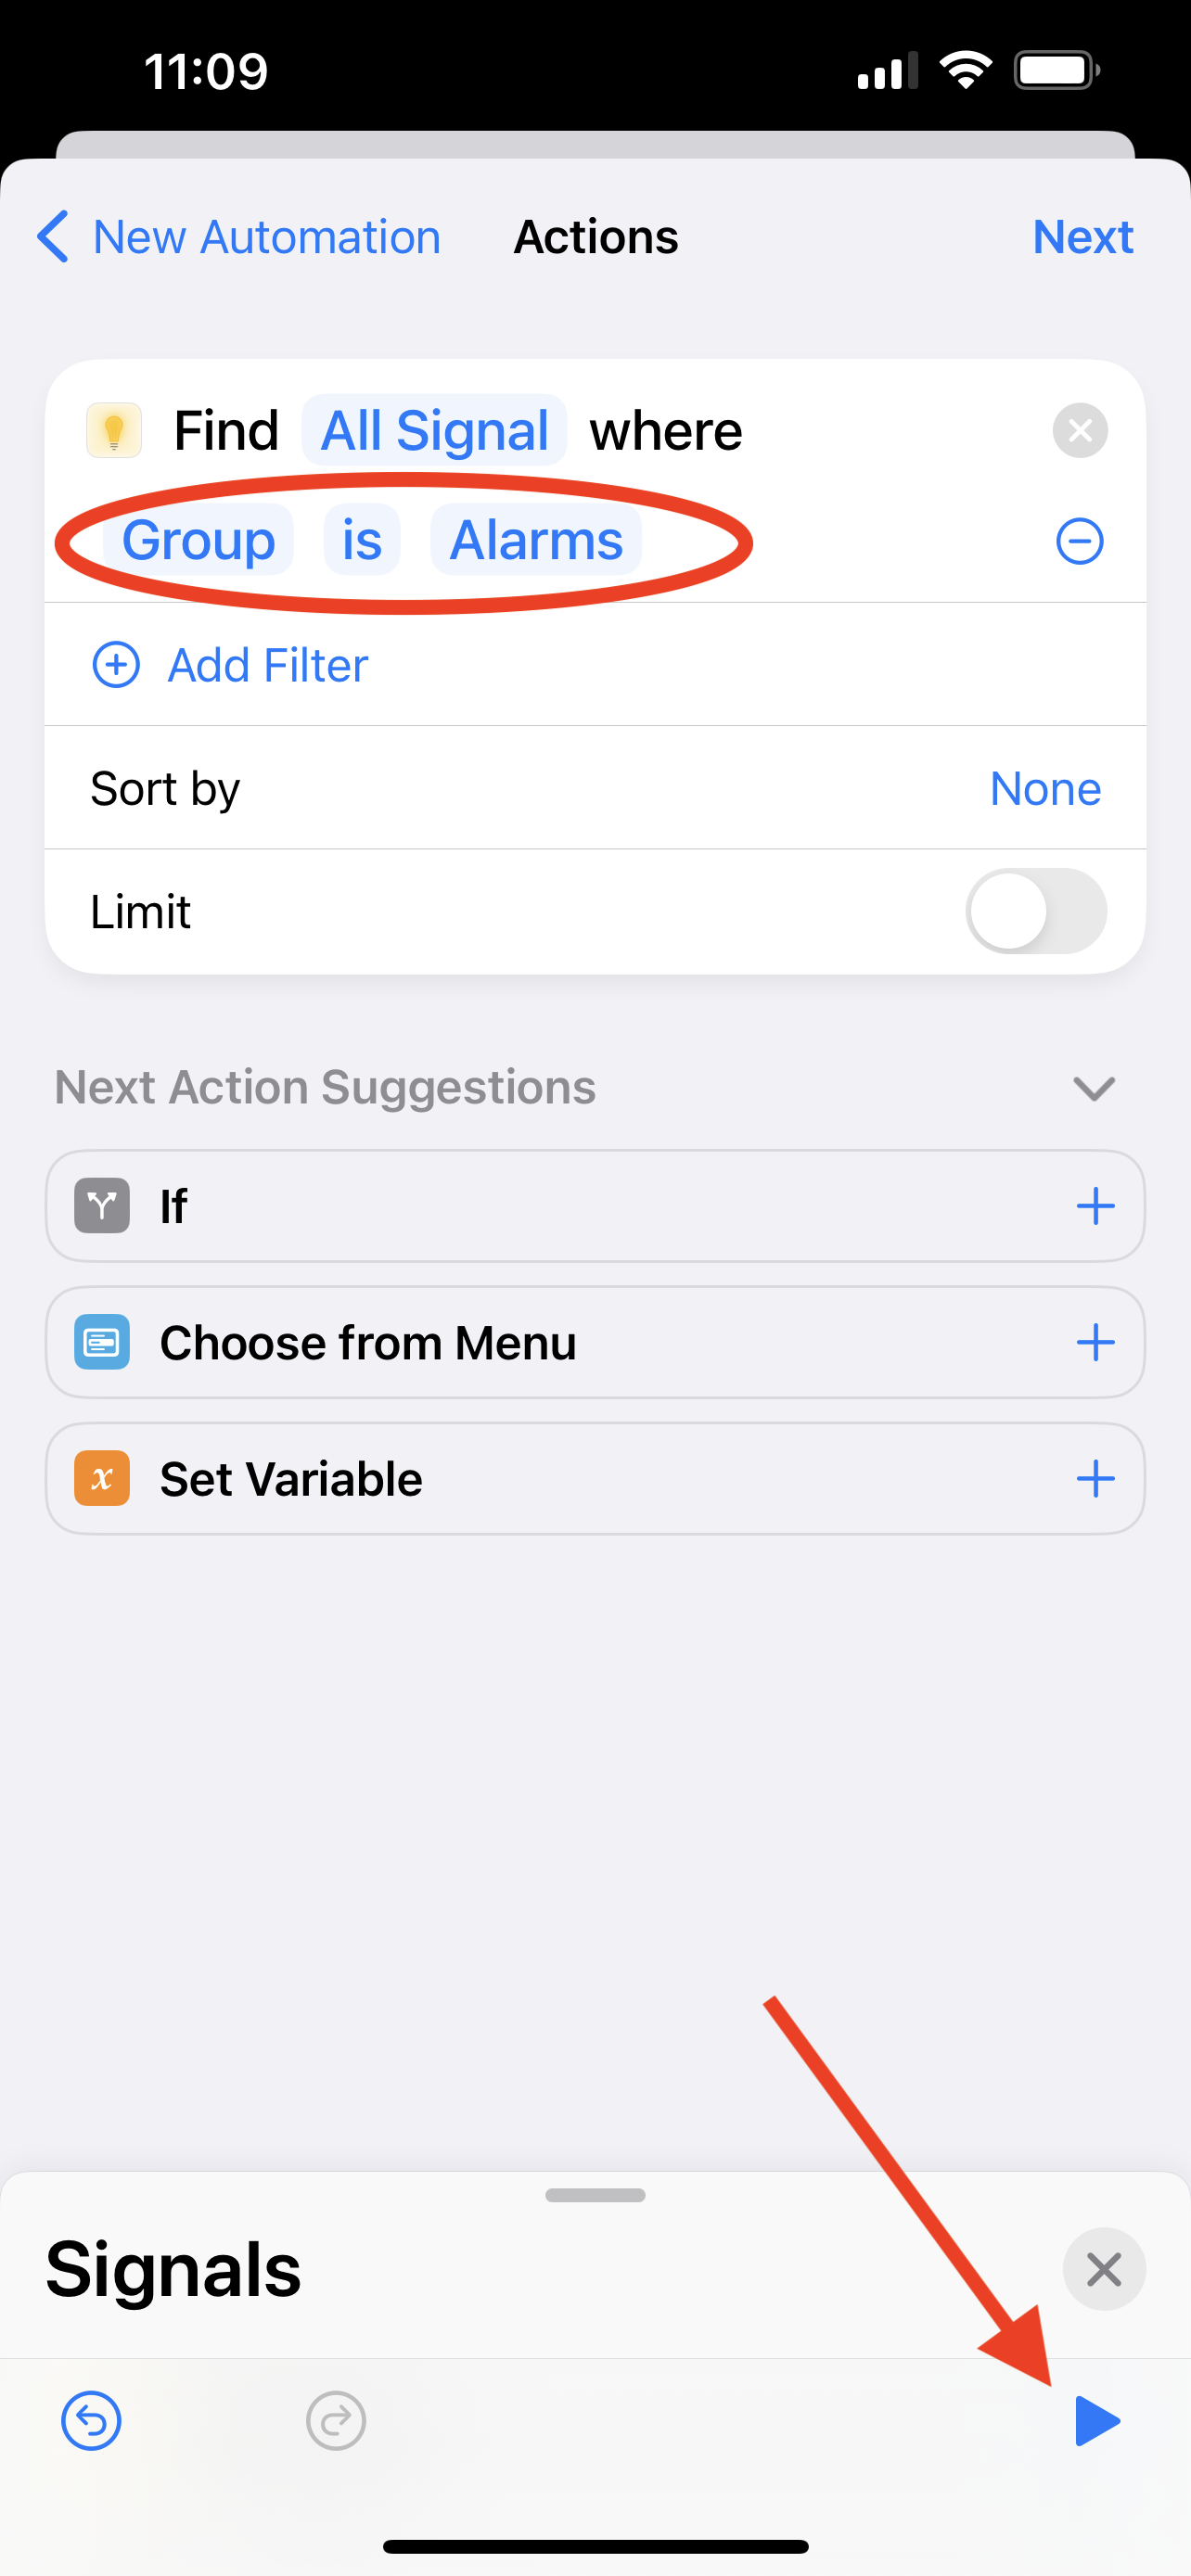
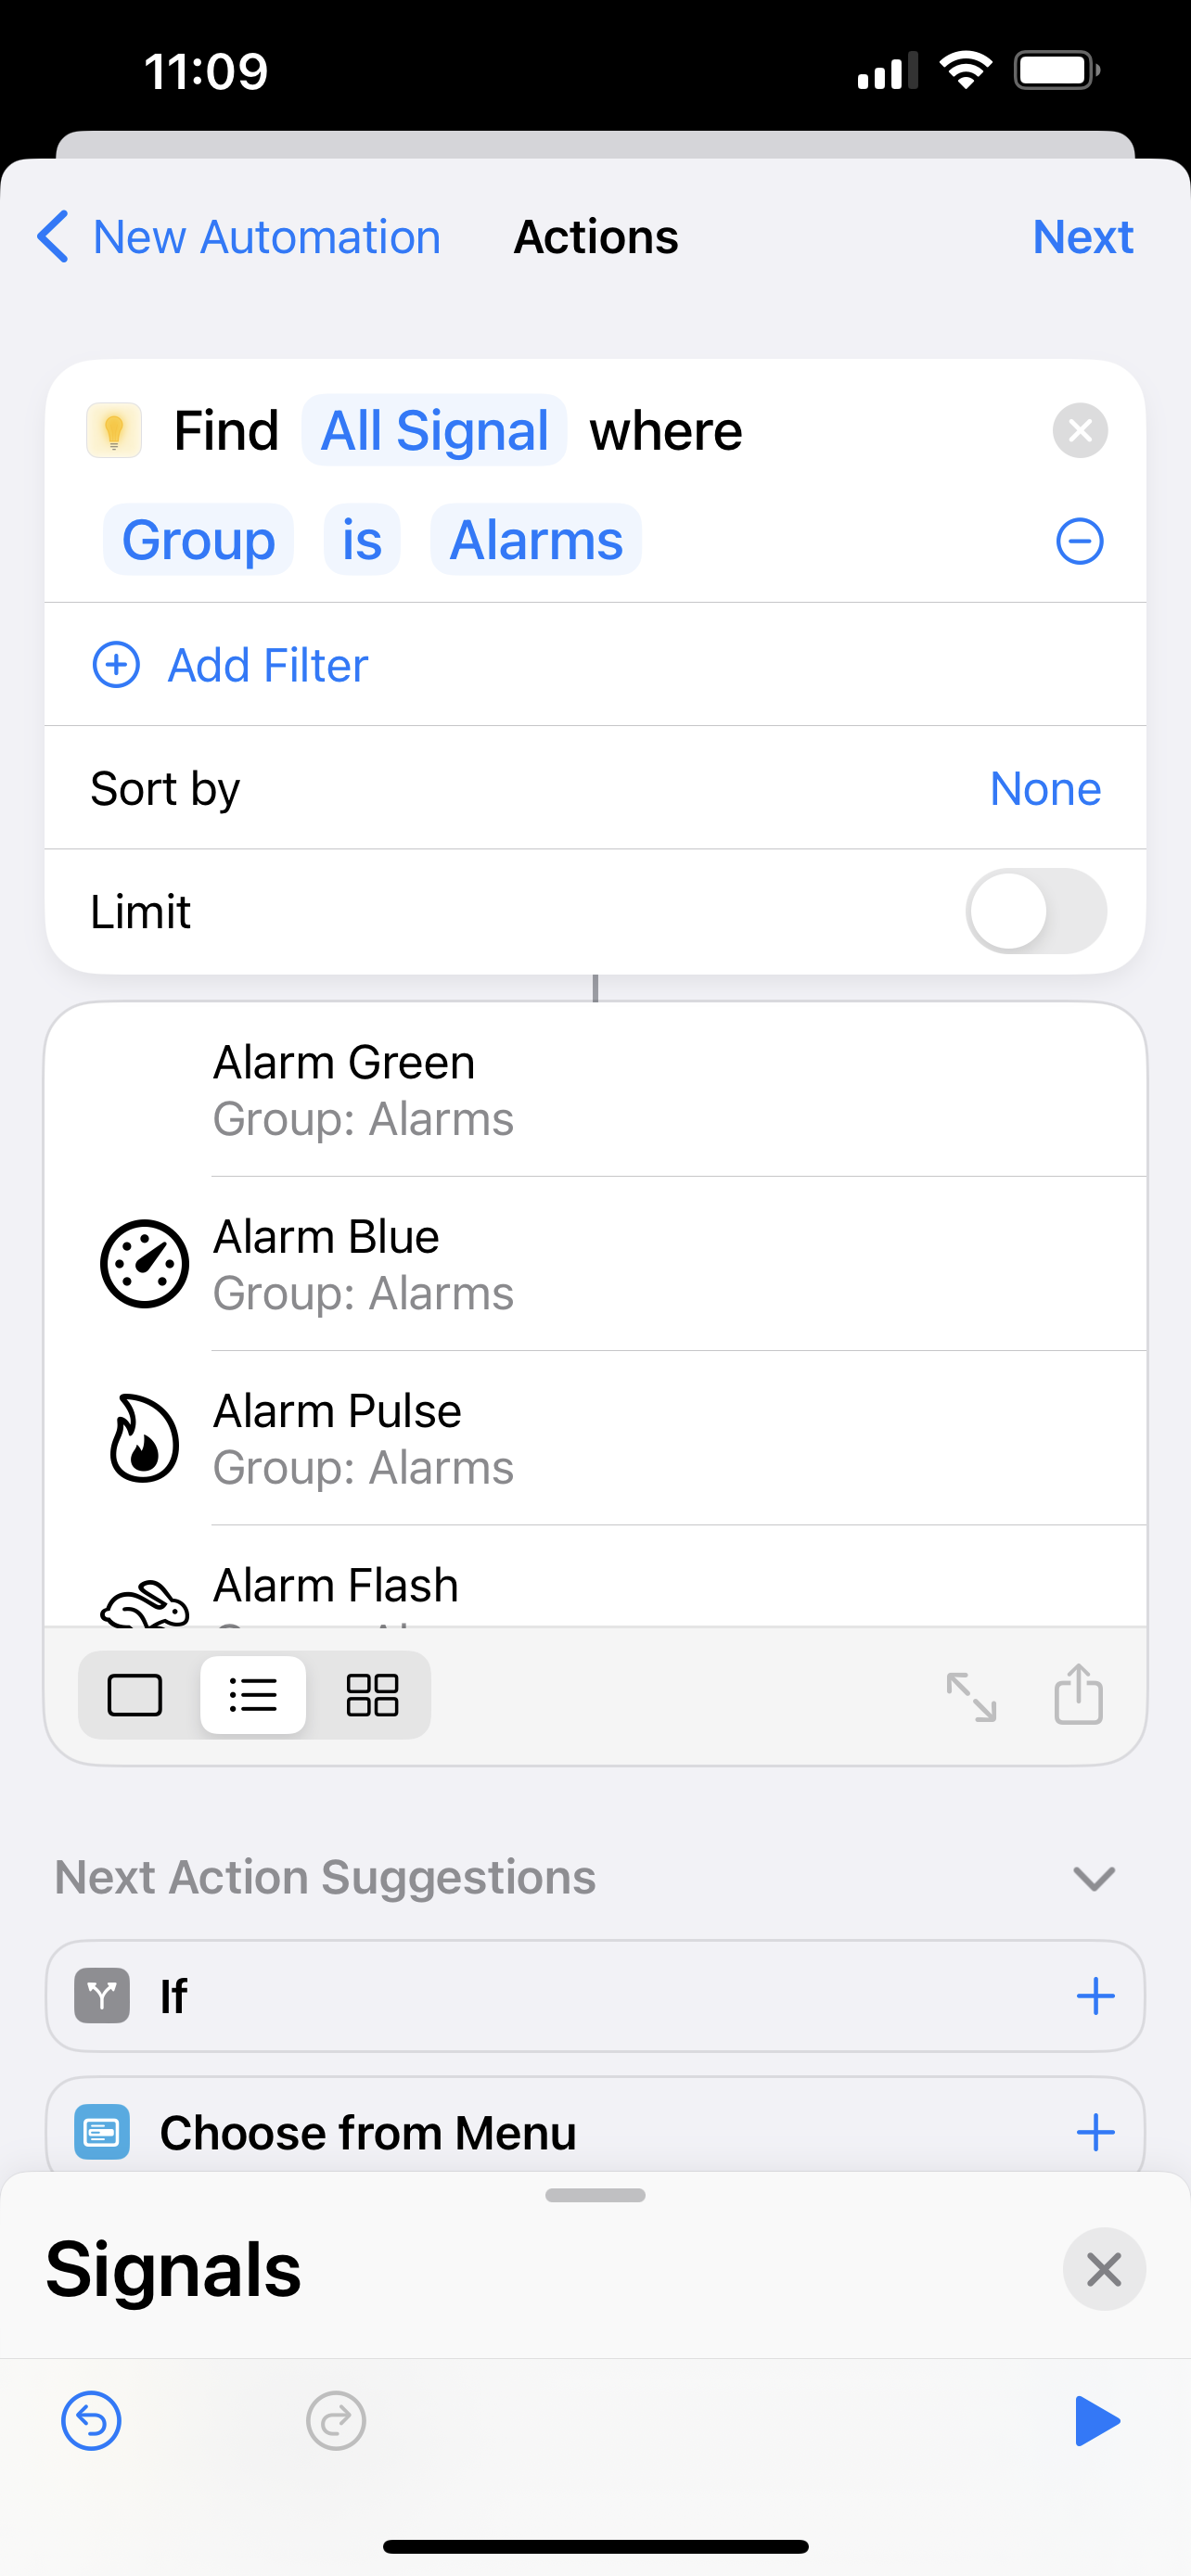
This is where we’re going to find all of our ‘Alarm’ Signals, and if you added them all to the same Group, it’s simple. Tap ‘Add Filter’, which will be pre-loaded with a filter that reads “Name Is _____” - tap the ‘Name’, and change it to ‘Group’, and then tap the ‘____’, and select your ‘Alarms’ group. That’s it! This would be a good time to run your action, to make sure that it shows you the list of your Alarm Signals, and nothing else.

Now that we have a list of all of our alarms, we need to pick one. Shortcuts comes with a built in command to ‘Get Item from List’ - the easiest way to find it is to search for ‘Random’, which should provide it as one of the first results. Selecting that will add a second Action to your Automation, which will probably read “Get First Item from Signal“ - make sure to tap the ‘First Item’ option, and change it to ‘Random Item’.
Finally, search for ‘Signals’ again, select the ‘Run Signal’ action, and make sure it reads “Run Item from List”. Before you’re done, I recommend tapping the little arrow in this final Action, and turning the “Show When Run” option off.
This would be a great time to run your Automation - do it a few times, and you should see that the Signal that is selected is chosen randomly. Nice!
We’re almost done, but there’s one more really important step. Tap ‘Next’, and be sure to turn off the “Ask Before Running” option — if you forget to do this, your phone will simply prompt you to run the Signal when your alarm goes off, which is probably not going to get your attention.


Done!
And that’s it! Does this help you out? I would love to hear about it - you can reach out to me on Twitter at @HomeMadeAuto!